


Installing Mosaic Tiles in 11 Steps
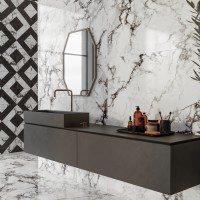
Mosaic tiles can be used on a shower floor or wall to create a colorful background to a decor or simply to add small bursts of color. These tiles are easy to install and harmonize well with other types of tiles. Here mosaic tiles are used to create a backsplash in the kitchen.
Before the installation make sure that the surface of the walls is smooth and flat. If your tiling over a painted wall lightly sand the surface first.
Here's the list of tools and materials for this project...
|
Tools: Bucket Caulking gun Gloves Grinder or wet cutting tile saw Grout float Hammer Level Masking Tape Measuring Tape Notched Trowel 3/16" Pencil Protective Sheet Pull Bar Robber Mallet Safety Goggles | Safety Goggles Screwdriver Sponge Tile Nipping Tool Utility Knife
Materials: Flat-head nails Ground Sealer Plastic Tile Spacers 1/8" or 1/16" Sanding Paper Sheets of Mosaic Tiles Silicone Sealer Tile Enhancer Tile Edge |
Step 1
Before you start switch off the power to electrical outlets and take-out decorative plates and other accessories anchor to the wall.
Protect the countertop and other surfaces with protective sheet using masking tape.
Step 2
To determine the layout of the mosaic tile, draw a vertical line in the center of the area to be tiled. Then draw a horizontal line to mark the position of first row.
Step 3
Install tile finishing trim at the edge of tile surface with flathead nails. Using a 3/16" notched trowel spread a thin coat of tile adhesive over a small section of wall to one side of the vertical line. Hold a trowel at a 45-degree angle, cover an area of three to four linear feet at a time.
Step 4
With the notched side of the trowel make grooves in the adhesive the grooves should all be made in the same direction dampen the adhesive if it starts to harden.
Step 5
Lay the first mosaic tile sheet, cut sheet to fit if necessary. Place tile spacers along the countertop so the tiles don't rest directly on it, later silicone will seal the gap between the two materials.
Step 6
Gently push the sheet into the adhesive to make sure it adheres well to the wall, if the adhesive squeezes up through the joints remove the tile sheet spread out the adhesive and start again.
Step 7
Lightly tap the tiles with the rubber mallet to make sure the sheets are firmly set on the wall.
Step 8
Continue installing the first row of mosaic tile sheet working from the center of the wall outwards. Separate each sheet with tile spacers to ensure even spacing. The gap between each sheet should be the same width as the gap between the individual tiles. With a level check that the tiles are flat and even, adjust with a rubber mallet if necessary.
Cover the entire surface section-by-section.
To work around electrical outlets, cabinets or other objects take the necessary measurements for the cut, then use a tile nipping tool a grinder or a wet saw.
To install individual pieces of mosaic tile, measure the space to cover then cut individual tiles from a sheet. If needed wet the surface of the tile and cut to size with the tile nipping tool. Apply adhesive on the back of the tile piece and press in place
Step 9
When all the tiles are installed wipe off excess adhesive with a damp sponge, wait 24 to 48 hours before grouting.
Step 10
Mix the grout according to the manufacturer's instructions the grout color should be even and have the consistency of toothpaste.
(If you use masking tape to protect surface, take it off before applying the grout).
Remove tile spacers and dampen the mosaic with the clean water. Using rubber grout float work the grout into the joints hold the float at a 45-degree angle.
Apply to grout section-by-section on a surface of 10 square feet at the time.
Don't apply grout to gaps separating the tiles from other type of materials like the countertop or cabinets.
Remove excess grout, then clean the surface with a damp sponge working diagonally over the tiles. Rinse the sponge often using as little water as possible so as not to dilute the grout.
Step 11
After 24-hours when the grout is completely dry apply grout sealer to the joints.
Finally after about couple of days caught the expansion joints with silicone sealer.